Zabbix - Unifi device monitoring
Table of Contents
Introduction
Welcome to another Zabbix guide! Today, I’ll walk you through setting up Zabbix to monitor Unifi devices (routers, switches, and access points). In my setup, I’ll be using Zabbix version 7.2.3 along with a few Unifi devices from my home network.
Unifi template for Zabbix
Before we start configuring, we need a Unifi template.
A while ago, I was looking for ways to integrate Unifi with Zabbix and found an interesting project on GitHub.
You can check it out here → https://github.com/MassimilianoPasquini97/zbx_unifi_network
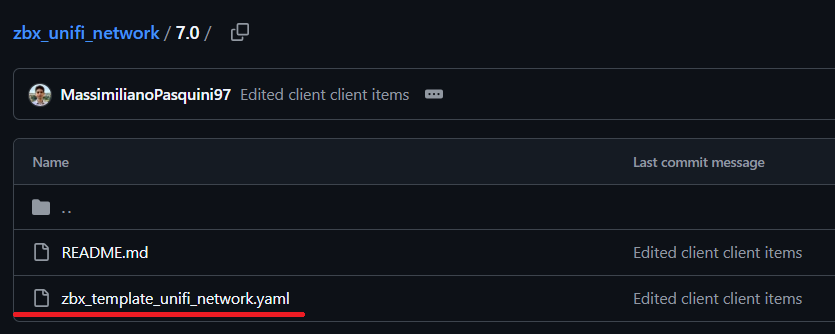
You’ll find templates for different Zabbix versions, such as 6.0, 6.2, 6.4, and 7.0.
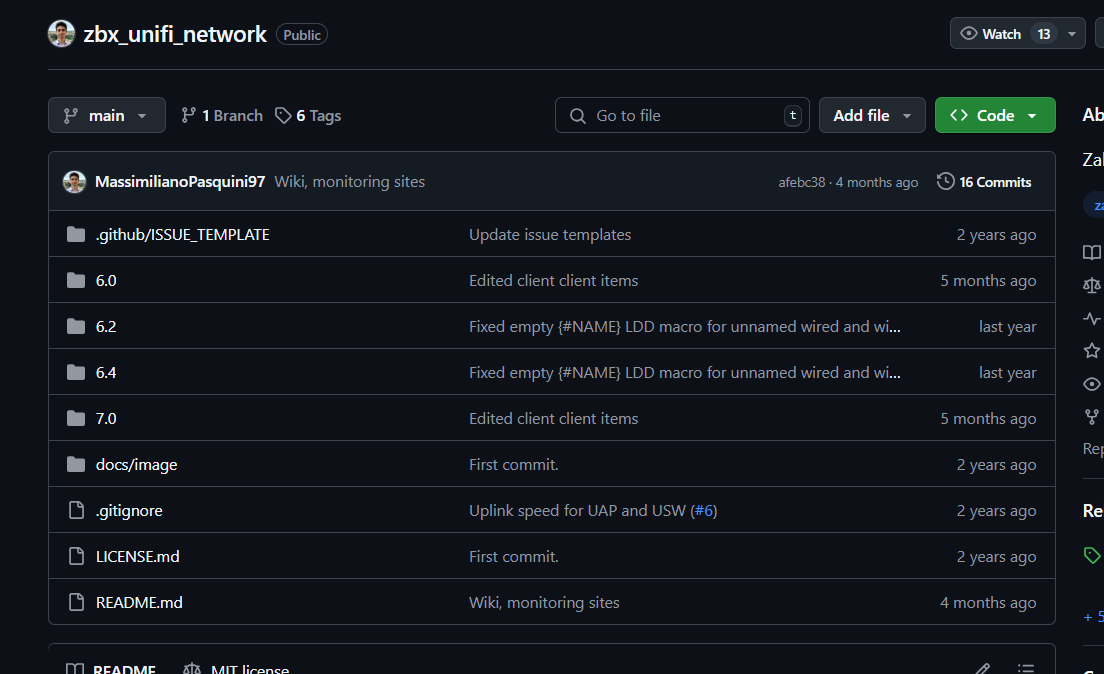
For this guide, we’ll use the template for version 7.0, which is compatible with Zabbix 7.2.3.
Download the zbx_template_unifi_network.yaml file to your computer.
Once you’ve downloaded the template, we can move on to configuring Unifi.
Unifi Configuration
This part is quite simple. We just need to create a user in Unifi for Zabbix to log in.
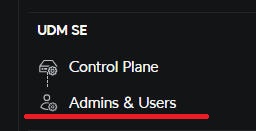
Log into your Unifi console and navigate to settings (gear icon in the bottom left corner).
![]()
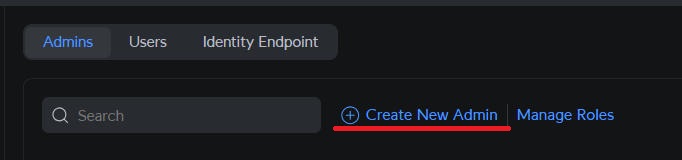
Then, go to Admin & Users
Click Create New Admin
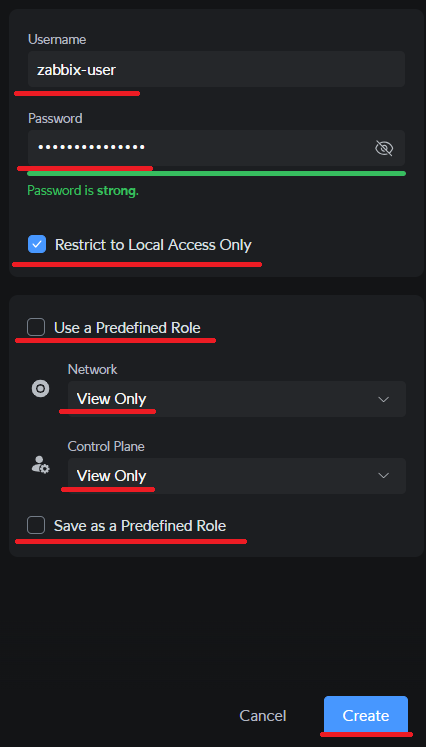
On the right side, a menu will appear where you need to enter a few details:
- Tick “Restrict to Local Access Only” (this ensures the account is only accessible from the local network)
- Username
- Password
- Uncheck “Use a predefined Role”
- Select “View Only” for both Network and Control Plane (this ensures the user cannot make any changes)
Once you’ve filled in all the details, click Create in the bottom right corner.
That’s it! Unifi is now ready. Let’s move on to the Zabbix configuration.
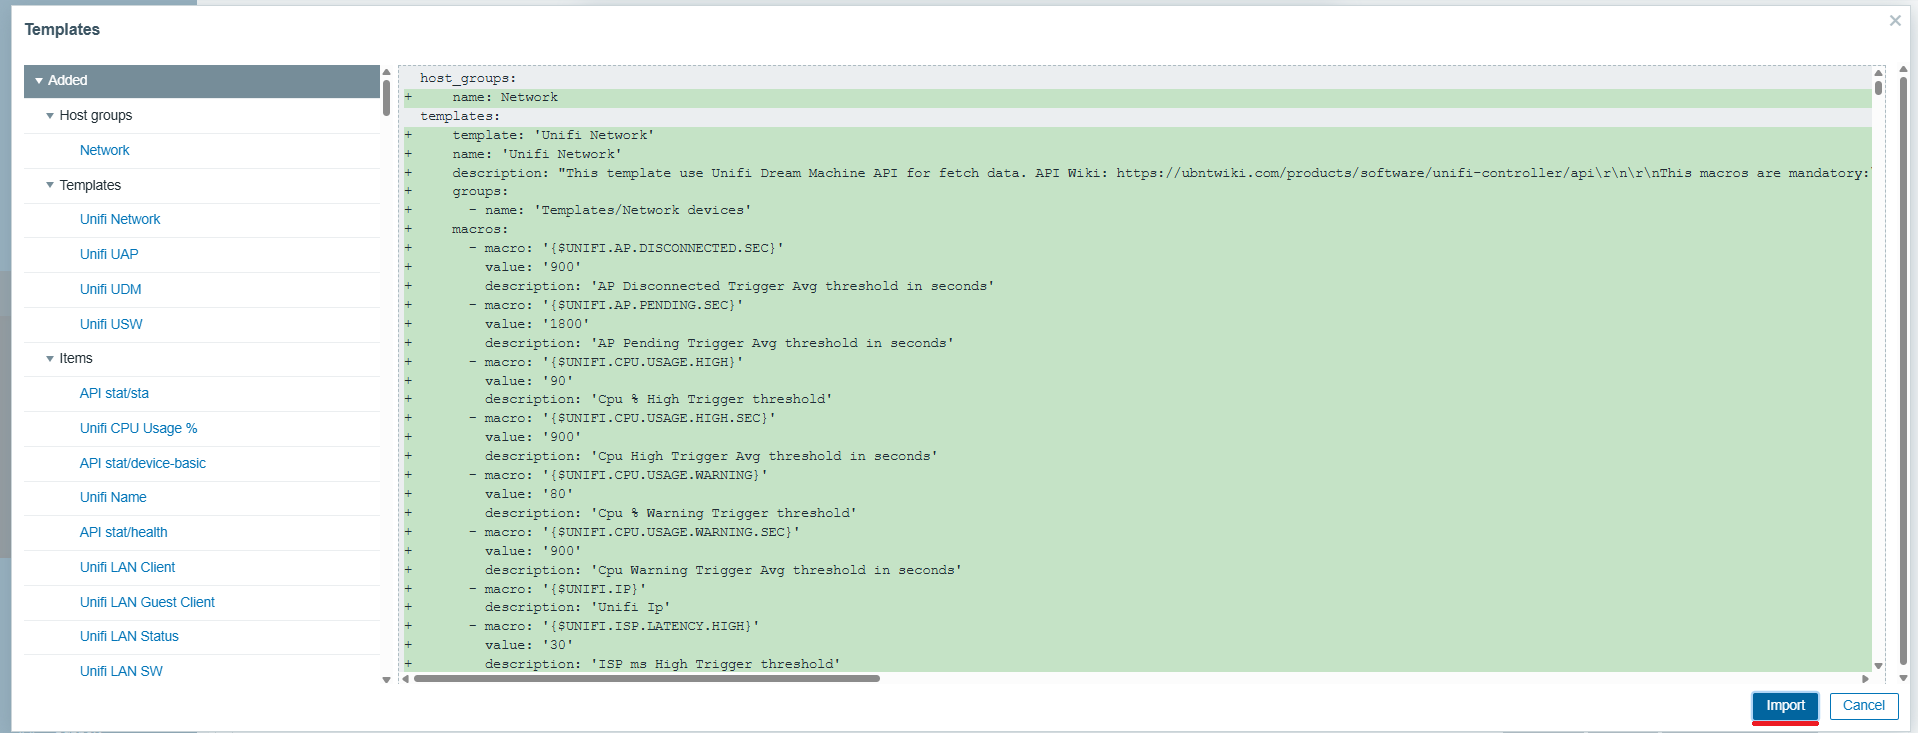
Importing the Unifi template into Zabbix
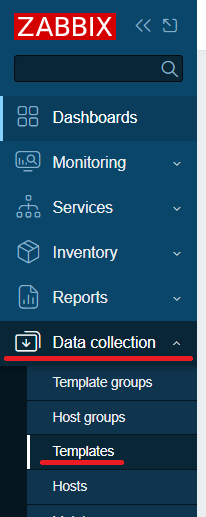
After logging into Zabbix, navigate to Data collection → Templates from the left menu
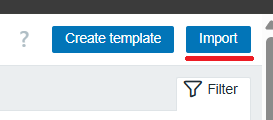
In the top right corner, click Import
A window will pop up for importing the template.
Click Choose file, select the downloaded template, and then click Import
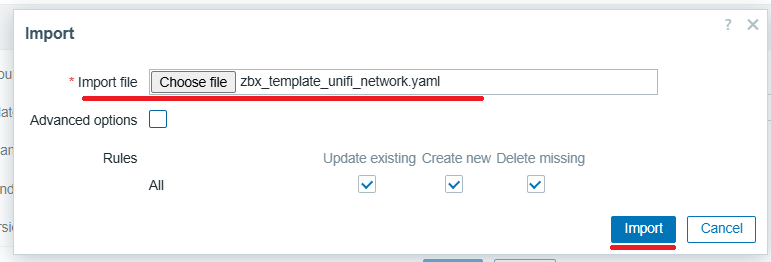
Once the template appears in the list, click Import again
Congratulations!
You’ve successfully imported the Unifi template. Now, let’s configure it!
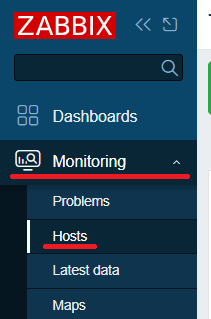
Adding Unifi to Zabbix
From the left menu, go to Monitoring → Hosts
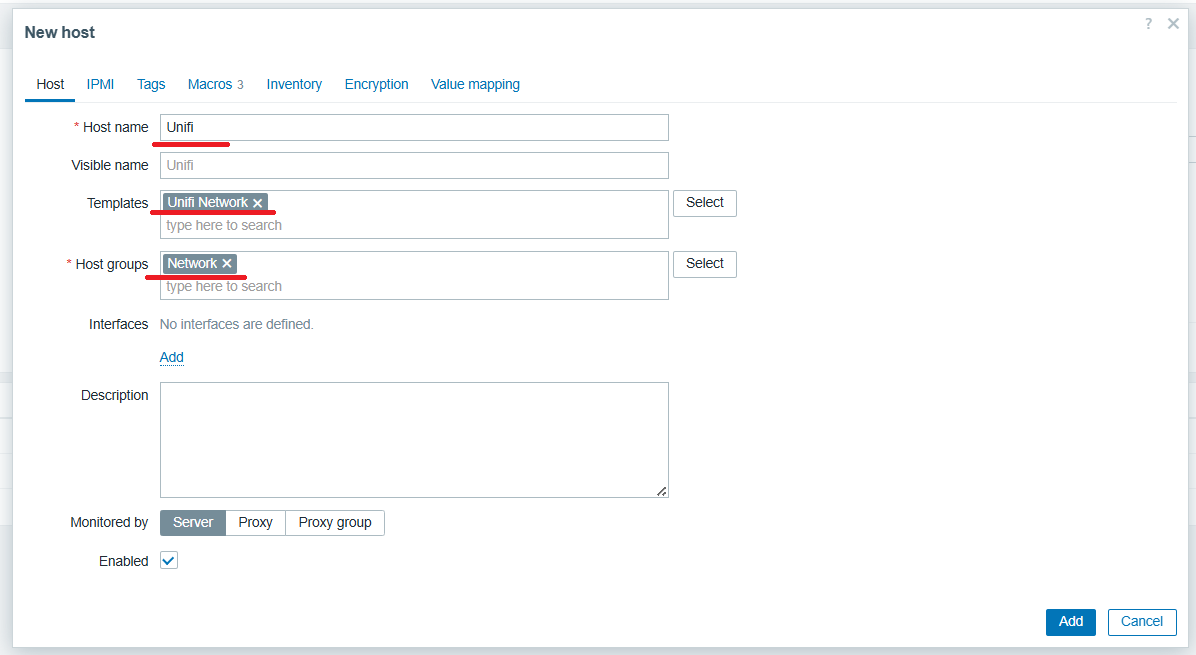
To add a new host, click Create host in the top right corner

A new window will appear. Under the Host tab, fill in:
- Host name – e.g., “Unifi”
- Templates – Start typing “Unifi,” and select Unifi Network
- Host groups – Choose “Network” or create a new group if needed
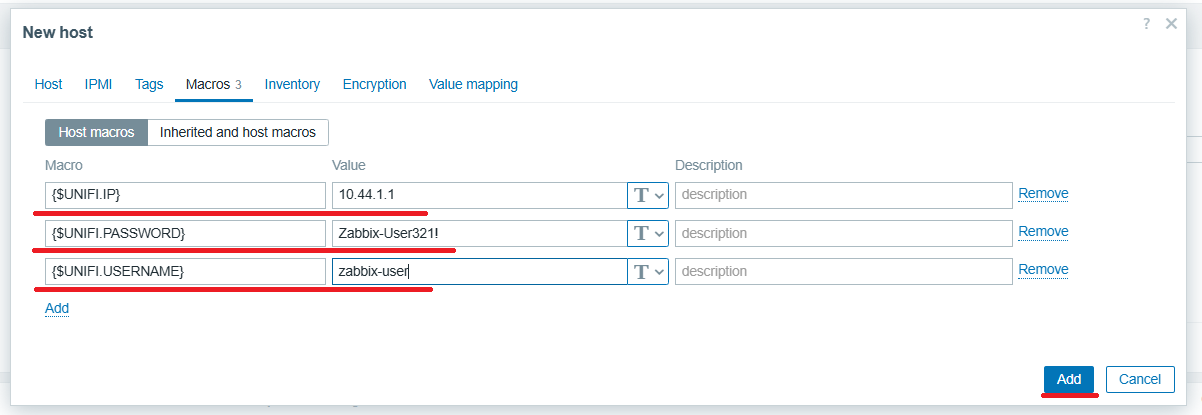
Now, switch to the Macros tab and add three entries:
- {$UNIFI.IP} – IP address of the Unifi controller or router
- {$UNIFI.PASSWORD} – Password for the Zabbix user
- {$UNIFI.USERNAME} – Username for the Zabbix user
Once you’ve entered all the details, click Add
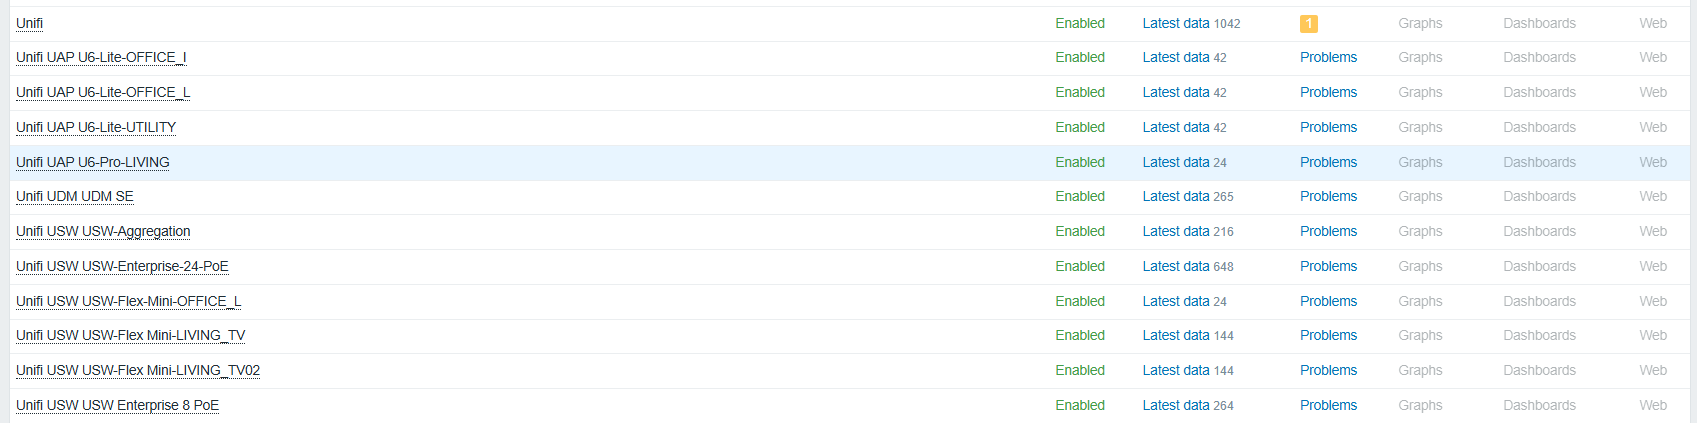
After about 2-3 minutes, your Unifi devices should appear in the Hosts list
Here’s how it looks in my setup
Conclusion
The configuration was simple, and in just a few steps, you’ve successfully configured Unifi device monitoring in Zabbix.
I won’t go into detail on all the metrics you can monitor because there are so many!
But to give you an idea, you can track CPU/memory usage, port status/speed, WiFi radio parameters, and much more.
All these details can be found in Latest data for each host.
Thanks for reading this guide to the end! I hope I explained everything clearly.
If you have any questions or would like me to cover a specific topic, feel free to leave a comment!
Cheers,
Lukasz
comments powered by Disqus